

A study illustration does not need movement to explain an idea. A clearly labeled drawing can stand alone, especially when someone wants to pause, compare details, or return to a particular point. Sometimes, however, a short sequence is a useful way to present your own explanation. The question is what the movement actually communicates.
Start with an original, fictional diagram rather than a photograph of a person or borrowed course artwork. Imagine three boxes labeled “Question,” “Comparison,” and “Summary,” connected by arrows. This is a planning example, not a model of a scientific process. You can use it to compare three presentation methods without claiming that any method improves memory, grades, or cognition.
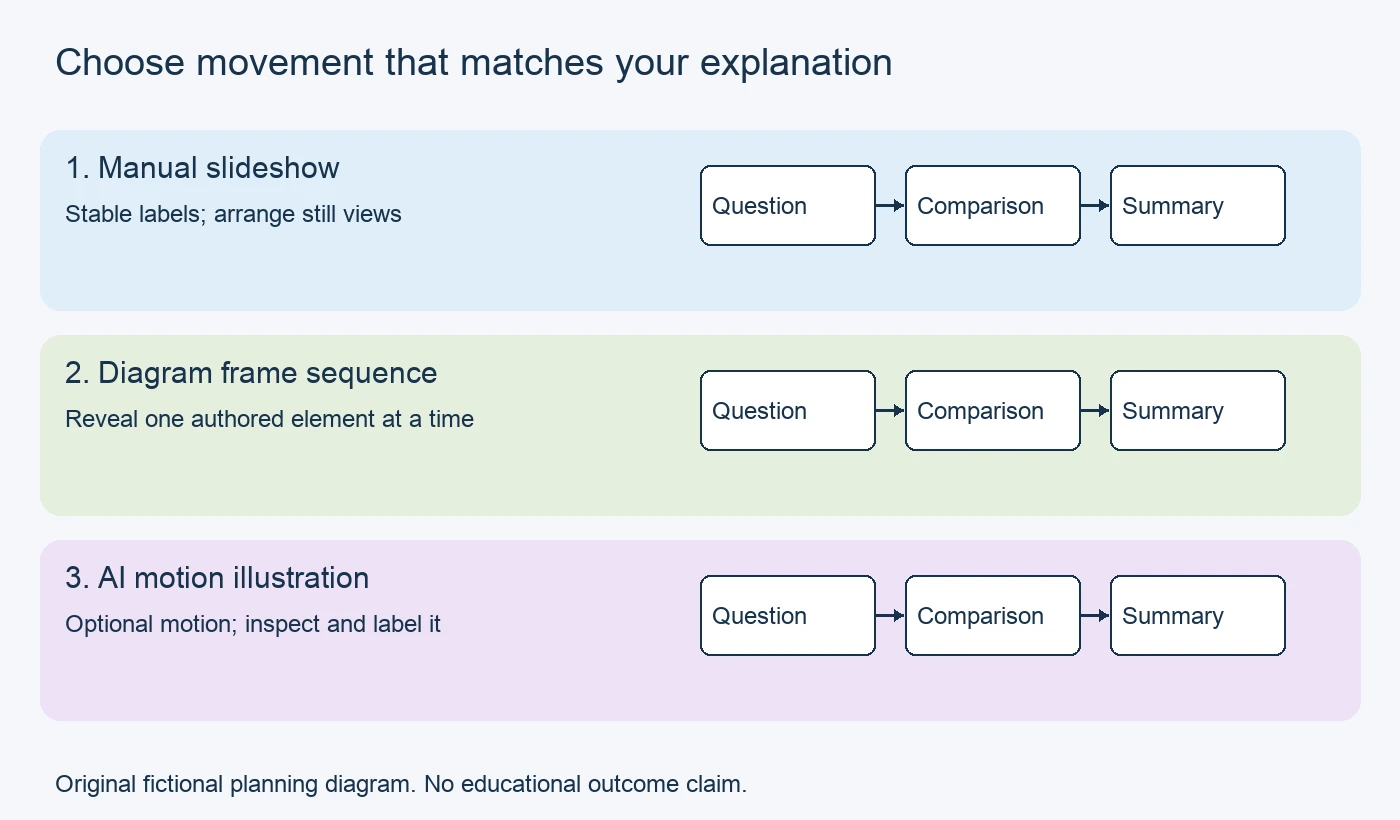
Conceptual workflow diagram to accompany the article. The illustration should distinguish manually arranged slides, deliberately changed diagram frames, and optional AI generated movement.
Decide what the explanation should say
Write one sentence describing the point of the sequence before opening a video editor. For the fictional diagram, the sentence might be: “This presentation introduces a question, places two alternatives beside each other, and ends with a written summary.” That statement gives each frame a purpose. It also makes unnecessary effects easier to remove.
Keep a source note beside your working file when the eventual subject comes from a textbook or another reference. Check terminology, relationships, and any proposed explanation against that source. An attractive drawing cannot establish whether an explanation is correct. If the source does not support a connection, revise the diagram before adding movement.
1. Arrange a manual slideshow for a stable explanation
A manual slideshow is a straightforward choice when your labels and layout should remain unchanged. Make a title slide, a full view of the original drawing, a closer view of one relevant detail, and a closing slide. Use a basic presentation application or video editor to arrange these still images in order.
For the fictional diagram, show all three boxes first. Next, crop around “Question,” then show “Comparison,” and finish with “Summary.” Keep a small overview on each detail slide if the crop would otherwise hide the relationship between the boxes. The sequence should remain understandable when viewed as separate stills.
Add explanatory text as editable slide elements, not as part of a decorative background. Choose readable type, sufficient contrast, and consistent placement. Let the amount of text guide how long each slide remains visible. Preview the exported file on a small screen and pause at every slide to check whether its wording can be read comfortably.
2. Build a diagram frame sequence for deliberate changes
A frame sequence suits an explanation in which you want precise control over what appears next. Duplicate the original drawing and change one element at a time. One frame might show the first box, another might introduce the second box, and a third might add the connecting arrow. These are authored visual steps, not recorded observations.
Preserve the same canvas size and element positions across frames. Otherwise, a box can appear to jump even though you intended only to reveal an arrow. Name the files in sequence and keep an untouched original. Exporting a contact sheet can make accidental differences easier to notice before assembling the video.
If the diagram represents an actual subject, confirm that the order is supported by your reference. A sequence can imply cause, timing, or direction even when you only intended to highlight details. Describe a purely organizational reveal as “parts of the explanation appearing in order,” rather than presenting it as a factual simulation.
3. Use AI motion for a clearly marked illustration
For an optional visual introduction, an image-to-video workflow offers a way to generate a short video from a starting image. Use an original, nonsensitive illustration and describe modest movement, such as a gentle shift across the page. Keep the factual explanation available in a separate still image or manually controlled sequence.
AI output is not an authoritative factual simulation. Generated movement may change shapes, add details, or suggest relationships that were absent from the original. Inspect the result against your drawing and source material. If a change misrepresents the point, discard the clip or choose the manual version.
Add diagram labels outside the generator, using a slide application or video editor. This keeps the wording under your control and allows corrections without regenerating the illustration. Label the clip “AI generated illustration” wherever it is presented. Do not describe imagined motion as footage of an experiment or evidence that a process works.
Make the final explanation usable without movement
Provide a written explanation or still sequence alongside the video. Add subtitles for spoken narration and review their wording rather than relying on an unchecked transcription. Describe the relevant visual changes in text so that the explanation does not depend only on color, sound, or animation.
Introduce the study sequence with an optional narrator
A fictional presenter can introduce the learning sequence using Magic Hour AI lip sync to match mouth movements to a narration track. Use permitted footage and audio, verify the script, and check timing throughout. Label synthetic material and provide captions and a transcript. Keep definitions, diagrams, and conclusions in separately checked text; animation does not establish their accuracy.
For a separate creative experiment, describe an original study illustration in a written prompt and explore it with Magic Hour AI video generator. Keep the result labelled as generated imagery, compare it with the storyboard and retain a still alternative; the generated scene is not evidence of a real event or a tested outcome.
Before sharing, compare every label, arrow, and sentence with the textbook or reference you are using. Separate your interpretation from the source’s claims. Choose the manual slideshow for stable labels, the frame sequence for deliberate reveals, or the marked AI clip for optional illustration. The simplest format that communicates the intended point is a complete choice.

Get 4 Free Sample Chapters of the Key To Study Book
Get access to advanced training, and a selection of free apps to train your reading speed and visual memory